This tutorial will show you how to make a simple drawstring bag with French seams. French seams encase your raw edges so that you don’t need to add a lining and you will end up with a very neat little bag. Once you have made one, you will want to stitch yourself a little stash, they are perfect to use as toy bags, laundry bags or a even a wash bag.
To make your drawstring bag you will need a piece of fabric, a length of cotton tape and your sewing machine threaded with coordinating thread. To work out how much fabric you need, decide on the size that you would like your finished bag to be, then add 7cm onto the height and 2cm to the sides. Then fold your fabric in half and cut out your piece on the fold. The fold will be the bottom of your bag.
Fold your piece of fabric in half wrong sides together so that the fold is at the bottom and the raw edges are lined up at the top. Measure down 7cm from the top on each side and put a pin in your fabric horizontally. This will be your marker to tell you where to stop sewing. Sew straight up the sides using a 1/8 inch seam allowance, stopping at the horizontal marker.
Turn the top edges of the side seam inwards by approximately 1/4 inch and press into place. Repeat this on both sides and sew into place, stitching as close to the edge as you can.
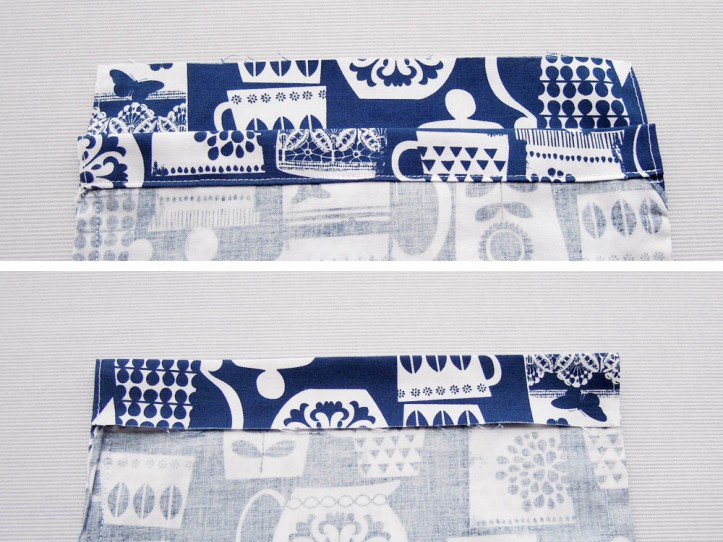
Turn your bag inside out and press the seams flat. Now you are going to make your French seams and encase the raw edges by sewing up the sides of your bag using a 1/4 inch seam allowance. Pop a pin just past the ends of your folded in edges and when you get to the pin sew at a right angle to your line of stitching towards the edge of your bag so that it hides any raw edges. Take a look at the photo below to see before and after.
Now to make the drawstring casing. Fold one of the edges over by 1/4 inch and press into place. Fold the fabric over again and line it up with the top of your side seam, the bottom photo shows this. Pin into place and sew as close to the edge as you can, making sure that the other side of the casing underneath is out of the way.
Once you have sewn the first channel into place, lie your bag down and use your first channel as a guide to line up the second one. Pin into place and sew close to the edge.
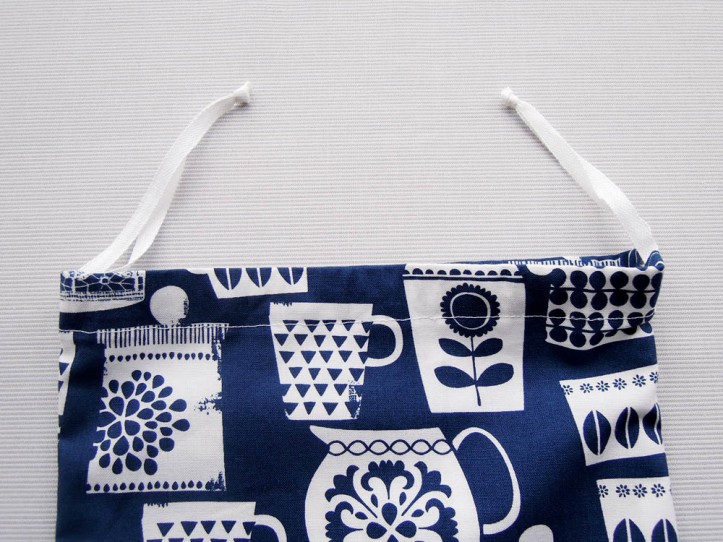
Attach a piece of your cotton tape to a safety pin, thread it through one of your channels and then back through the channel on the other side. Thread a second length of cotton tape through in the opposite direction.
Knot the ends and trim close to the knots.
Your drawstring bag is complete!


Thank you for this tutorial 🙂 I understand now and the bag looks awesome 🙂
Court
Great tutorial- exactly what I was looking for- French seams AND a good finish to where the drawstring edges are!
Fantastic!
Really good! I put a bag for life inside just before sewing the seams, to make my daughter a waterproof wash bag!
Perfect! So pleased you liked the tutorial Laura.
Love this tutorial. Am I making two channels for the strings? I haven’t and it seems to work ok. First time I have done french seams, they are so perfect. Will do them often. I love the finish inside. Thanks
Yes, just the one channel. Fantastic, well done!
thanks, I really liked this tutorial. First time I have done french seams, great way to deal with the raveling cotton.
My pleasure! Yes, French seams are great for finishing something off beautifully.
Thank you so much for this great tutorial. I will sew a drawstring backpack (for animal shelter bazars ❤ ) and I was desperately looking for a way to make those french seams inside since I hate raw edges that are not enclosed 😉 .
Thanks again and greetings from Germany 🙂 .
Lovely! Enjoy sewing 🙂
Thank you for this tutorial! It’s perfect! I’m teaching my daughter to sew, and this is exactly what I was looking for. She plans to make several drawstring bags and drawstring skirts as donations for Operation Christmas Child boxes and for Little Dresses for Africa. Her idea is to make matching bags and skirts. Thank you for helping me help her help others!
O that is fantastic! Thank you for your lovely comment Anni 🙂
This is the exact type of drawstring bag pattern I was looking for! I will be teaching two young ladies ( ages 7 and 8 ) how to make this bag. Thank you for your very clear instructions and photos.
My pleasure, thank you for your message x
Hi Georgina,
Thank you for this very clear tutorial, I wanted to let you know it’s perfected my bag making skills 4 years after you first put in on the internet, my problem has always been that I couldn’t work out how to do the top fold tiny while using French seams, but now I’ve perfected my twist thank you to your tutorial!
Thank you x
Perfect! Thanks for your lovely comment. X
Thank you for the tutorial. I made a couple of shoe bags for packing in my suitcase and I am very happy with how they turned out.
Fantastic! I’m very pleased you enjoyed the tutorial and what a good idea to make shoe bags!
Hurrah. Exactly what I was looking for and explained clearly. I knew about how to do this but needed the details. Thank you.
Fab! Happy stitching Katrina!
Just found this tutorial. Very easy to follow for a beginner. Thank you!